How to change or reset the default printer driver settings (Windows)
The default printer driver settings for an A4 inkjet printer include A4 Paper Size, Plain Papers, Portrait orientation, and the Text print quality mode.
You can change the default settings to your preference or revert back to the default settings by accessing the printer driver via the Printers folder.
To change the printer driver back to the default settings you should close any open applications and follow the procedure below.
- Click on the Start menu, then Control Panel.
- In Control Panel, open the printers folder. See the following article if you require further help with this step: How to open the Devices and Printers folder in Windows
- In the Printers folder right-click on your Epson printer icon then from the menu and left-click on Printing Preferences.
- Follow the section appropriate to your printer type to change the settings in the driver:
Inkjet printers
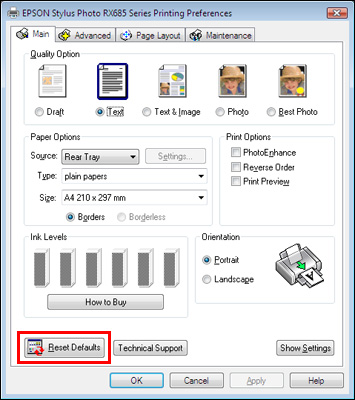
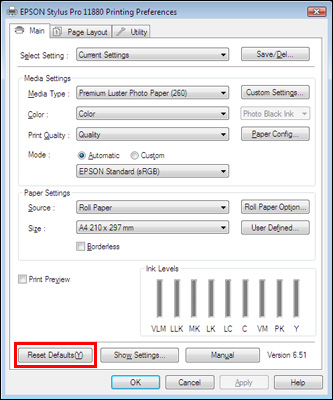
- Start in the Main tab of the printer driver.
-
Click on the Reset Defaults button located in the bottom-left of the window.
-
Click OK to save any changes as the new default driver settings.
- The Apply button will remain greyed-out, the OK button will save the changes.
-
For some printers, you will have the following Epson driver tabs:
Main | Paper | Layout | Utility
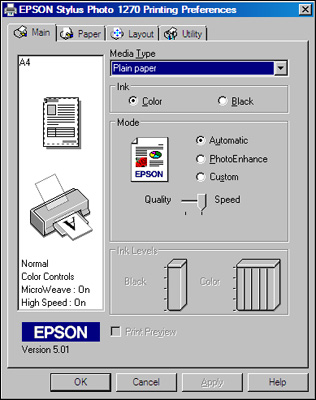
There isn't a 'Default' button in this style of driver. If your printer driver does not have a 'Default' button, you can do the following:
- Click on any of the tabs to check the settings and change them as necessary.
-
Click OK to save any changes as the new default driver settings.
- The Apply button will remain greyed-out, the OK button will save the changes.
Laser printers
-
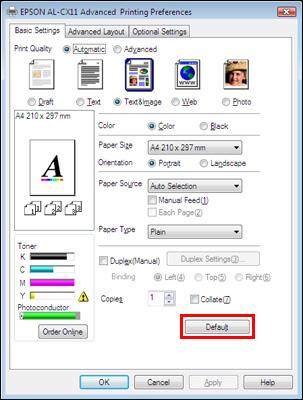
Click on the Default button found at the bottom of the Basic Settings tab in the driver:
-
Click OK to save any changes as the new default driver settings.
- The Apply button will remain greyed-out, the OK button will save the changes.